Setup DataRow.io AWS
To use DataRow.io AWS, you need to grant DataRow.io permission to access your AWS account. DataRow.io uses and manages your AWS resources to run your jobs, and use your KMS to manage your secret key.
Step 1 - Create S3 bucket for DataRow.io
This section walks through steps for S3 bucket related setup in your AWS account. This bucket will be used by DataRow.io for storing files and libraries. It’s recommended to use a bucket dedicated for DataRow.io, instead of sharing a bucket with your other files.
Login to AWS console, navigate to Amazon S3
Click Create bucket
Enter bucket name you prefer
Complete the rest of S3 bucket setup with default settings
Step 2 - Create SNS topic for DataRow.io (Optional)
This section walks through steps for SNS related setup in your AWS account. DataRow.io will send notification when any run fails. This is optional setup, if you don’t need run failure notification, leave this blank.
Login to AWS console, navigate to Amazon SNS
Click Create topic
Enter topic name you prefer
Step 3 - IAM Roles
This section walks through steps for IAM role related setup in your AWS account.
EMR role
Note
If you already have role for EMR, you can use your existing role. If not, follow the steps below to create a default EMR role
Login to AWS console, navigate to IAM service, and click Roles tab in the sidebar.
Click Create role.
Choose AWS service and click EMR
Select EMR option under user case
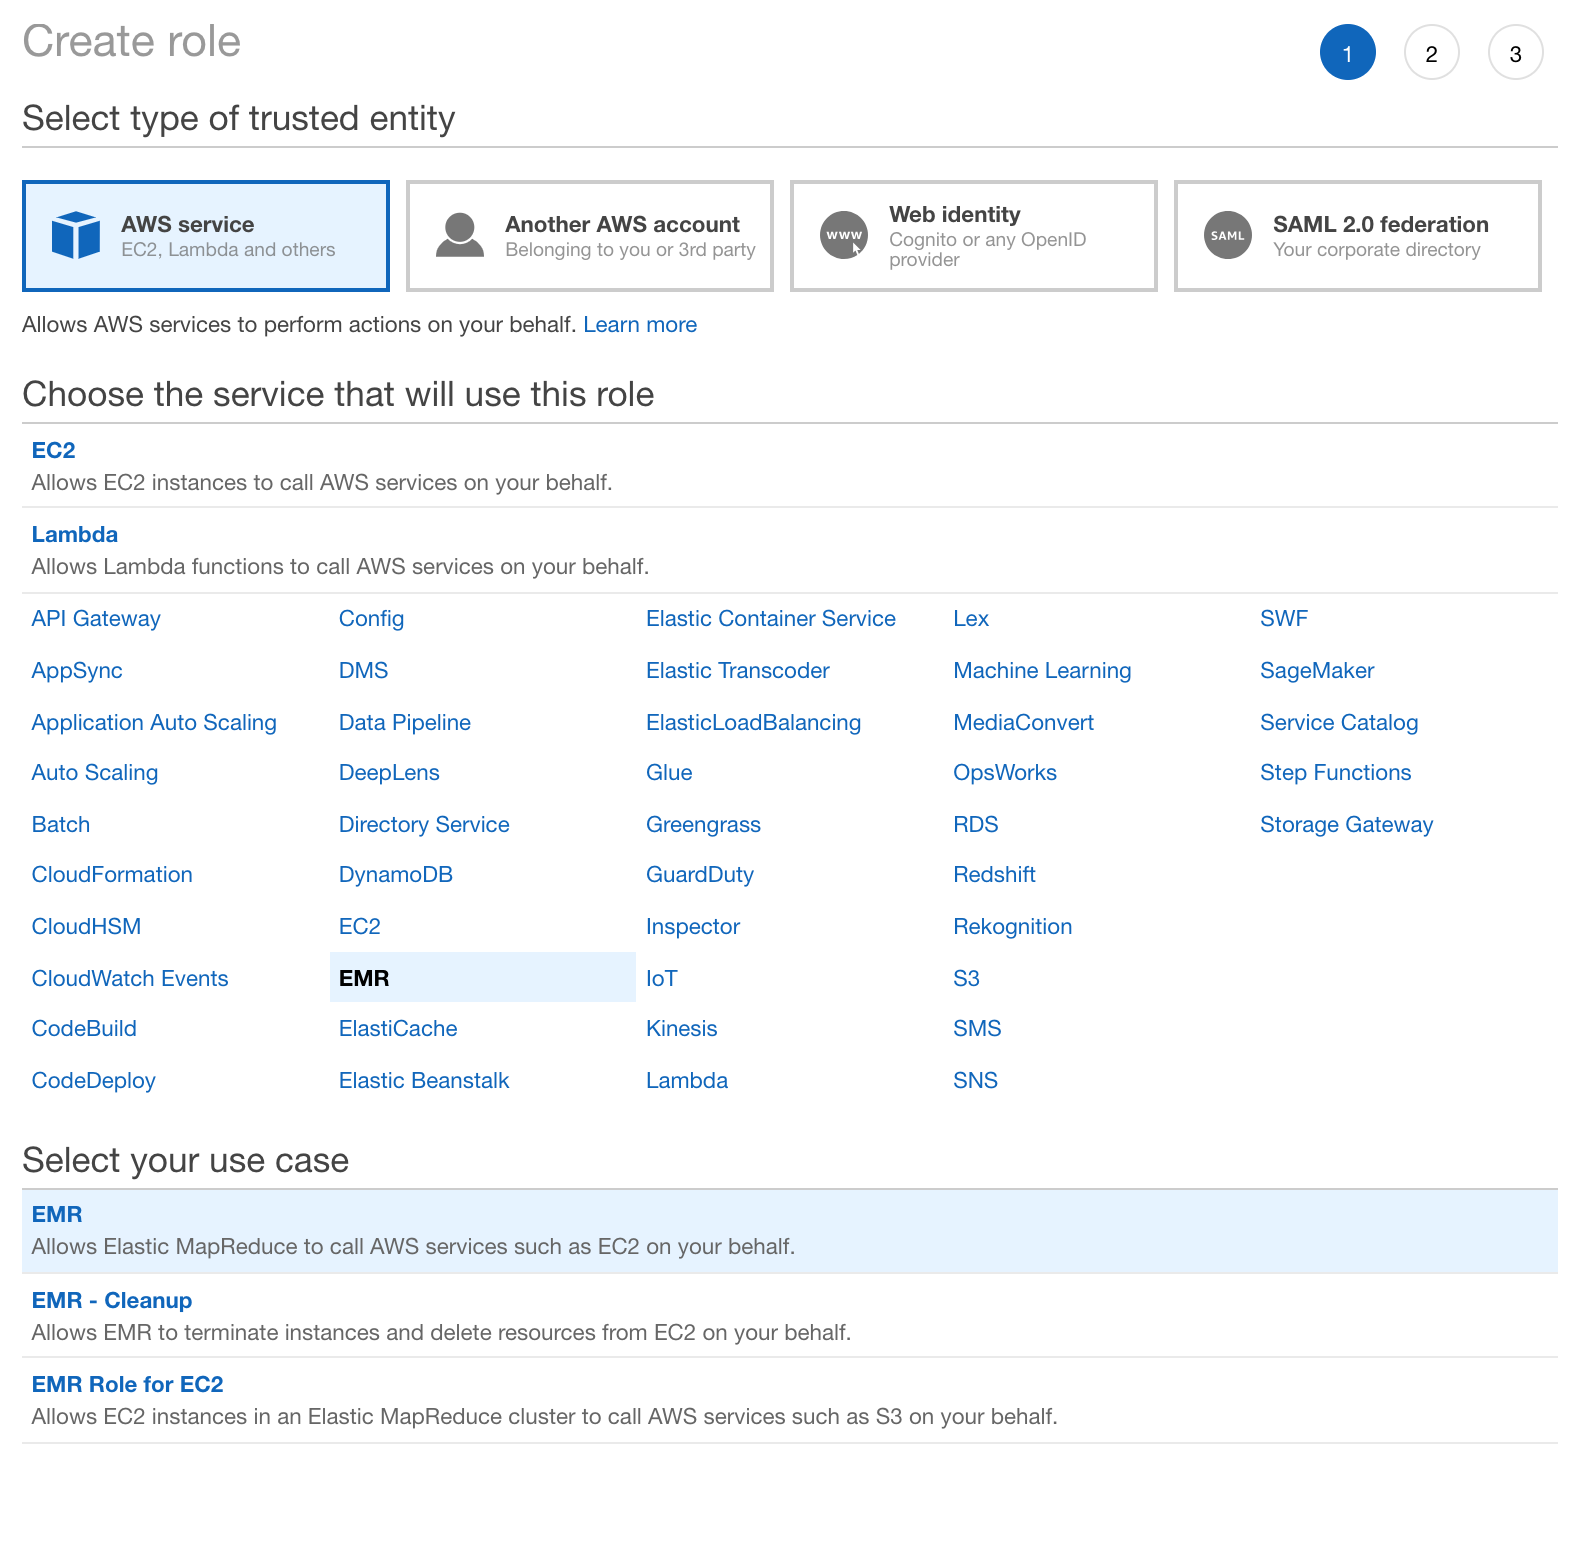
Click Next: Permissions
Click Next: Review
Enter a role name your prefer. This role name will be use in later steps.
Click Create role, you will be navigate to your list of roles
EMR Role for EC2
Note
If you already have role for EMR Role for EC2, you can use your existing role. If not, follow the steps below to create a default EMR Role for EC2
Login to AWS console, navigate to IAM service, and click Roles tab in the sidebar.
Click Create role.
Choose AWS service and click EMR
Select EMR Role for EC2 option under user case

Click Next: Permissions
Click Next: Review
Enter a role name your prefer. This role name will be use in later steps.
Click Create role, you will be navigate to your list of roles
DataRow.io role
Login to AWS console, navigate to IAM service, and click Roles tab in the sidebar.
Click Create role.
Choose Another AWS account
Enter Account ID:
613877504880
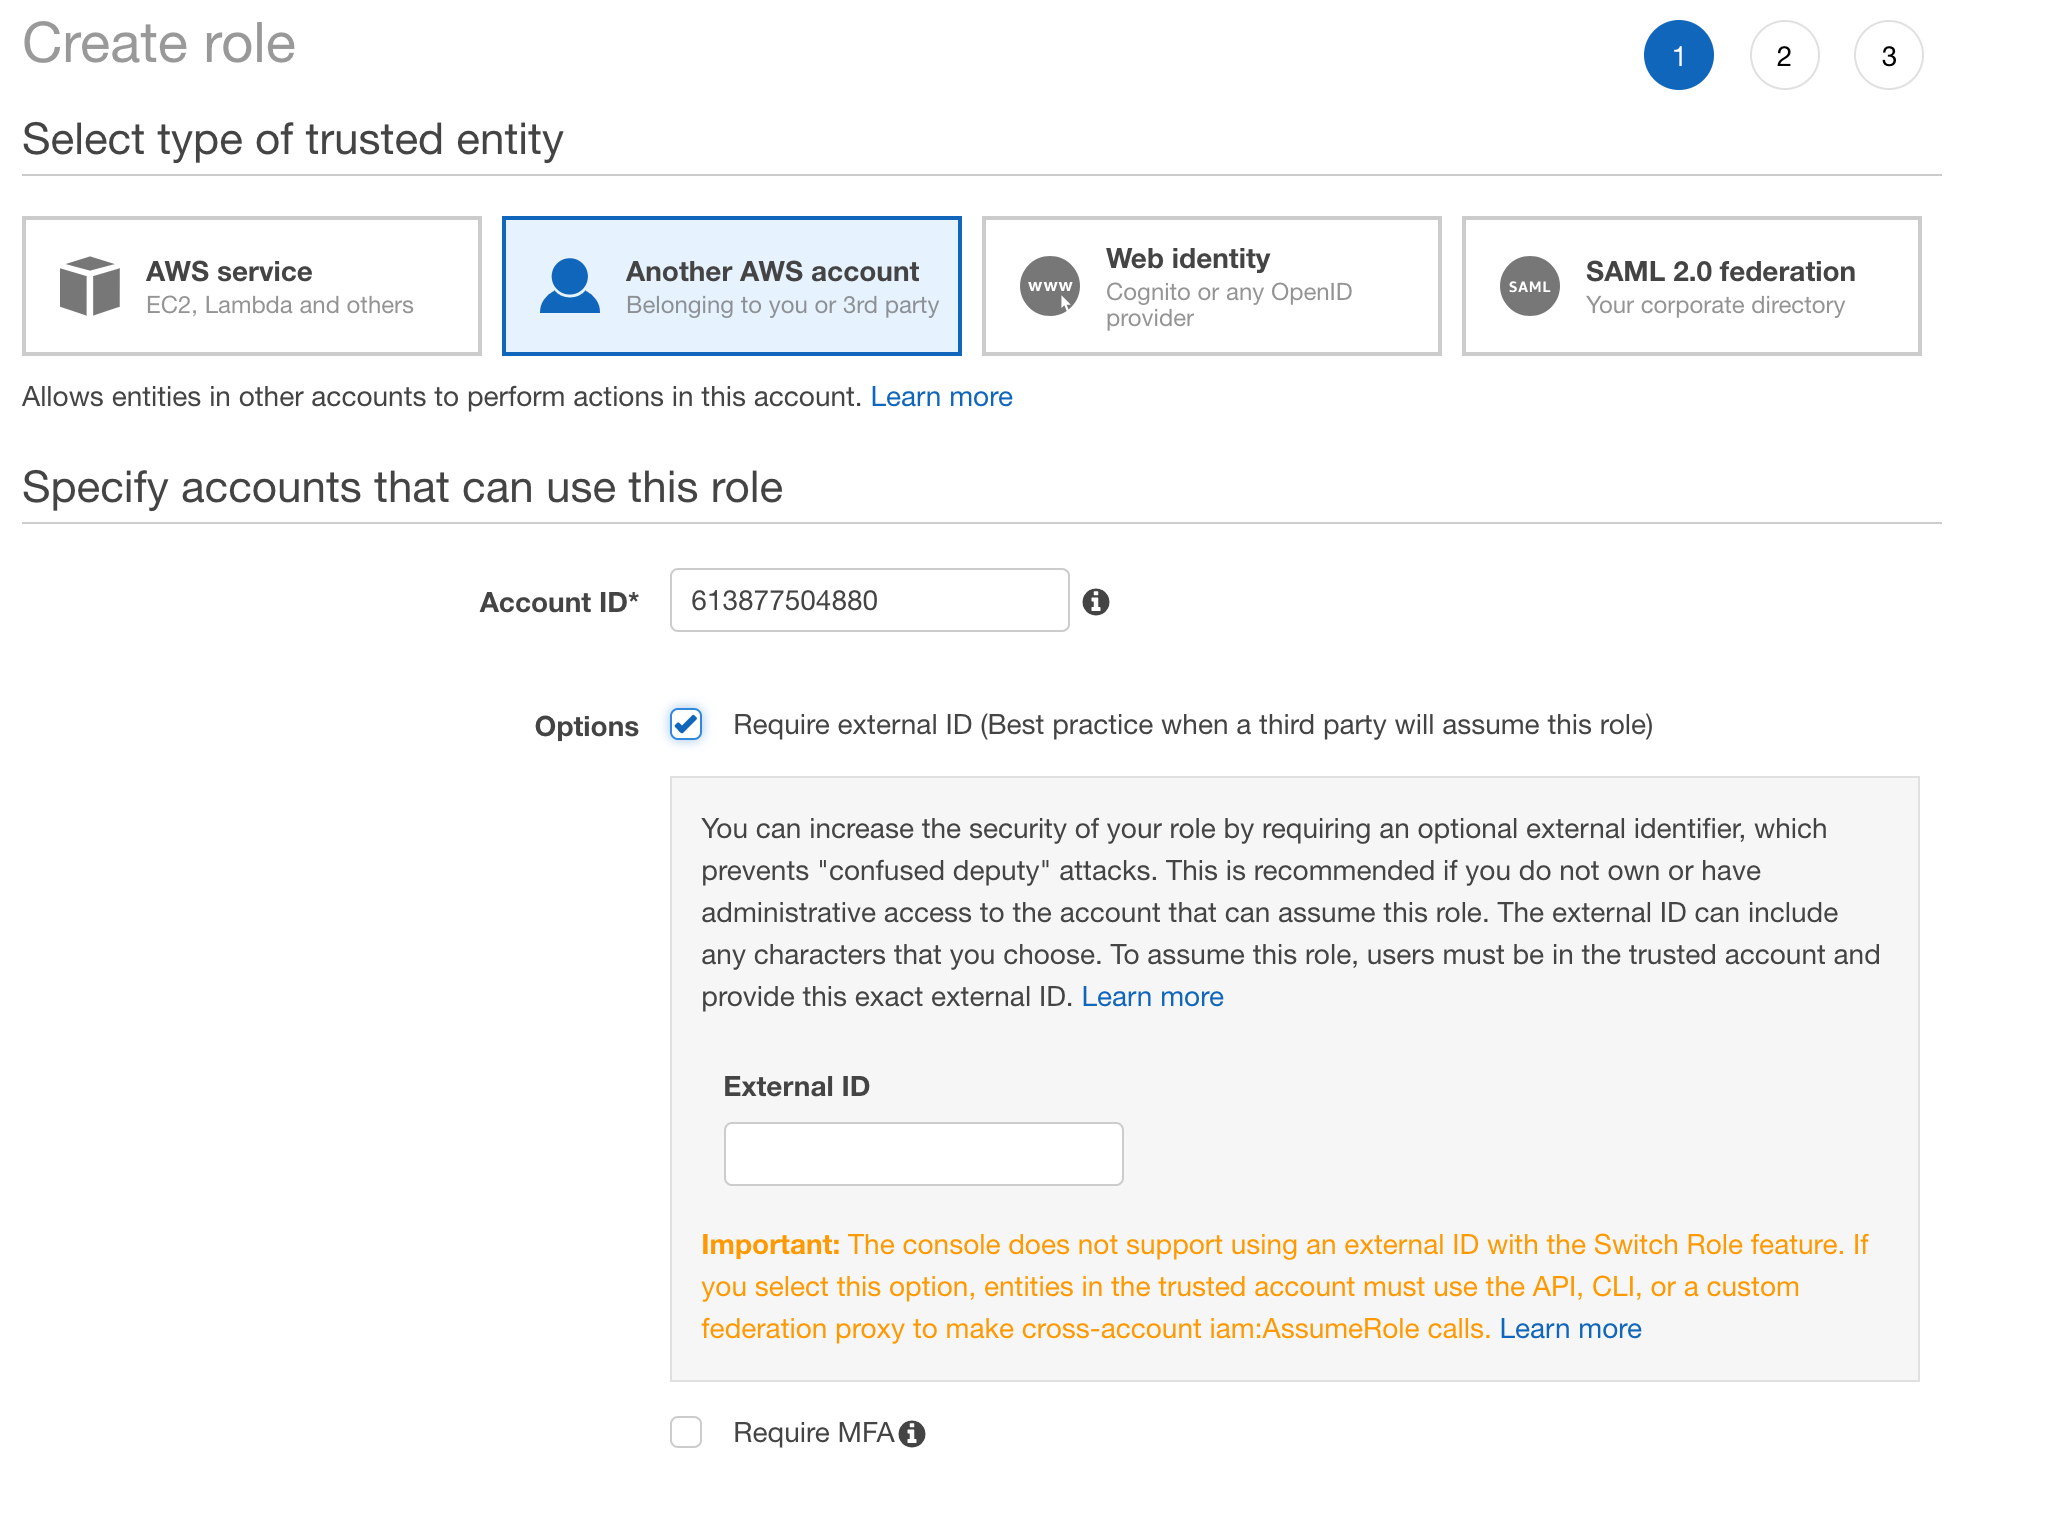
Check Require external ID and enter your unique external ID from DataRow.io
Do not check Require MFA
Click Next: Permissions
Click Next: Review
Enter a role name your prefer
Click Create role, you will be navigate to your list of roles
Click the role you just created from the list of roles
Under Permissions tab, click on Add inline policy link
Click JSON tab
Update and paste the policy below to inline policy editor a. Replace bucket name of S3 created from step 1 b. Replace EMR role created above c. Replace EMR Role for EC2 created above d. Replace EMR Role for EC2 created above
{
    "Version": "2012-10-17",
    "Statement": [
        {
            "Action": "elasticmapreduce:*",
            "Effect": "Allow",
            "Resource": "*"
        },
        {
            "Action": "s3:*",
            "Effect": "Allow",
            "Resource": [
                "arn:aws:s3:::your-s3-bucket-for-datarow",
                "arn:aws:s3:::your-s3-bucket-for-datarow/*"
            ]
        },
        {
            "Action": [
                    "iam:PassRole"
            ],
            "Effect": "Allow",
            "Resource": [
                "arn:aws:iam::*:role/your_emr_role_name",
                "arn:aws:iam::*:role/your_emr_for_ec2_role_name"
            ]
        },
        {
            "Effect": "Allow",
            "Action": [
            "sns:Publish"
            ],
            "Resource": "your_sns_topic_arn"
        }
    ]
}
Note
For easier setup, you can use wild card (*) on resources for iam:PassRole action and s3. Otherwise you need to replace the value from above policy to your s3 ARN and your emr roles ARN.
Click Review Policy
Enter a policy name you prefer
Click Create policy
You will see this role’s ARN. Save this value, it will be use in later steps. (You can always come back to this view to get the ARN information)
Step 4 - Create KMS customer master key for DataRow.io
This section walks through steps for KMS related setup in your AWS account. DataRow.io use your KMS to create your customer master key which under your control. You can choose to create a new customer master key for DataRow.io or using an existing one.
Login to AWS console, navigate to Amazon IAM
Click Encryption keys on the sidebar
Click Create key
Enter a Alias you prefer
Click Next Step
Enter tags you prefer
Click Next Step
Choose roles can administer this key. (You can click Next Step if you don’t want any role to be able to administer this CMK)
Click Next Step
Check the 3 roles created in Step 2 IAM Roles section: The EMR role, EMR Role for EC2 and DataRow.io role.
Click Attach
Step 5 - other AWS resource - VPC subnet
This section explains VPC subnet setup in your AWS account.
You can use your existing subnet in your AWS account. As you will see later in this documents, DataRow.io requires one subnet which will be used by EMR clusters in your AWS account. It’s recommended to use a public subnet. If you choose to use a private Subnet, you may need to configure network address translation (NAT) and VPN gateways.
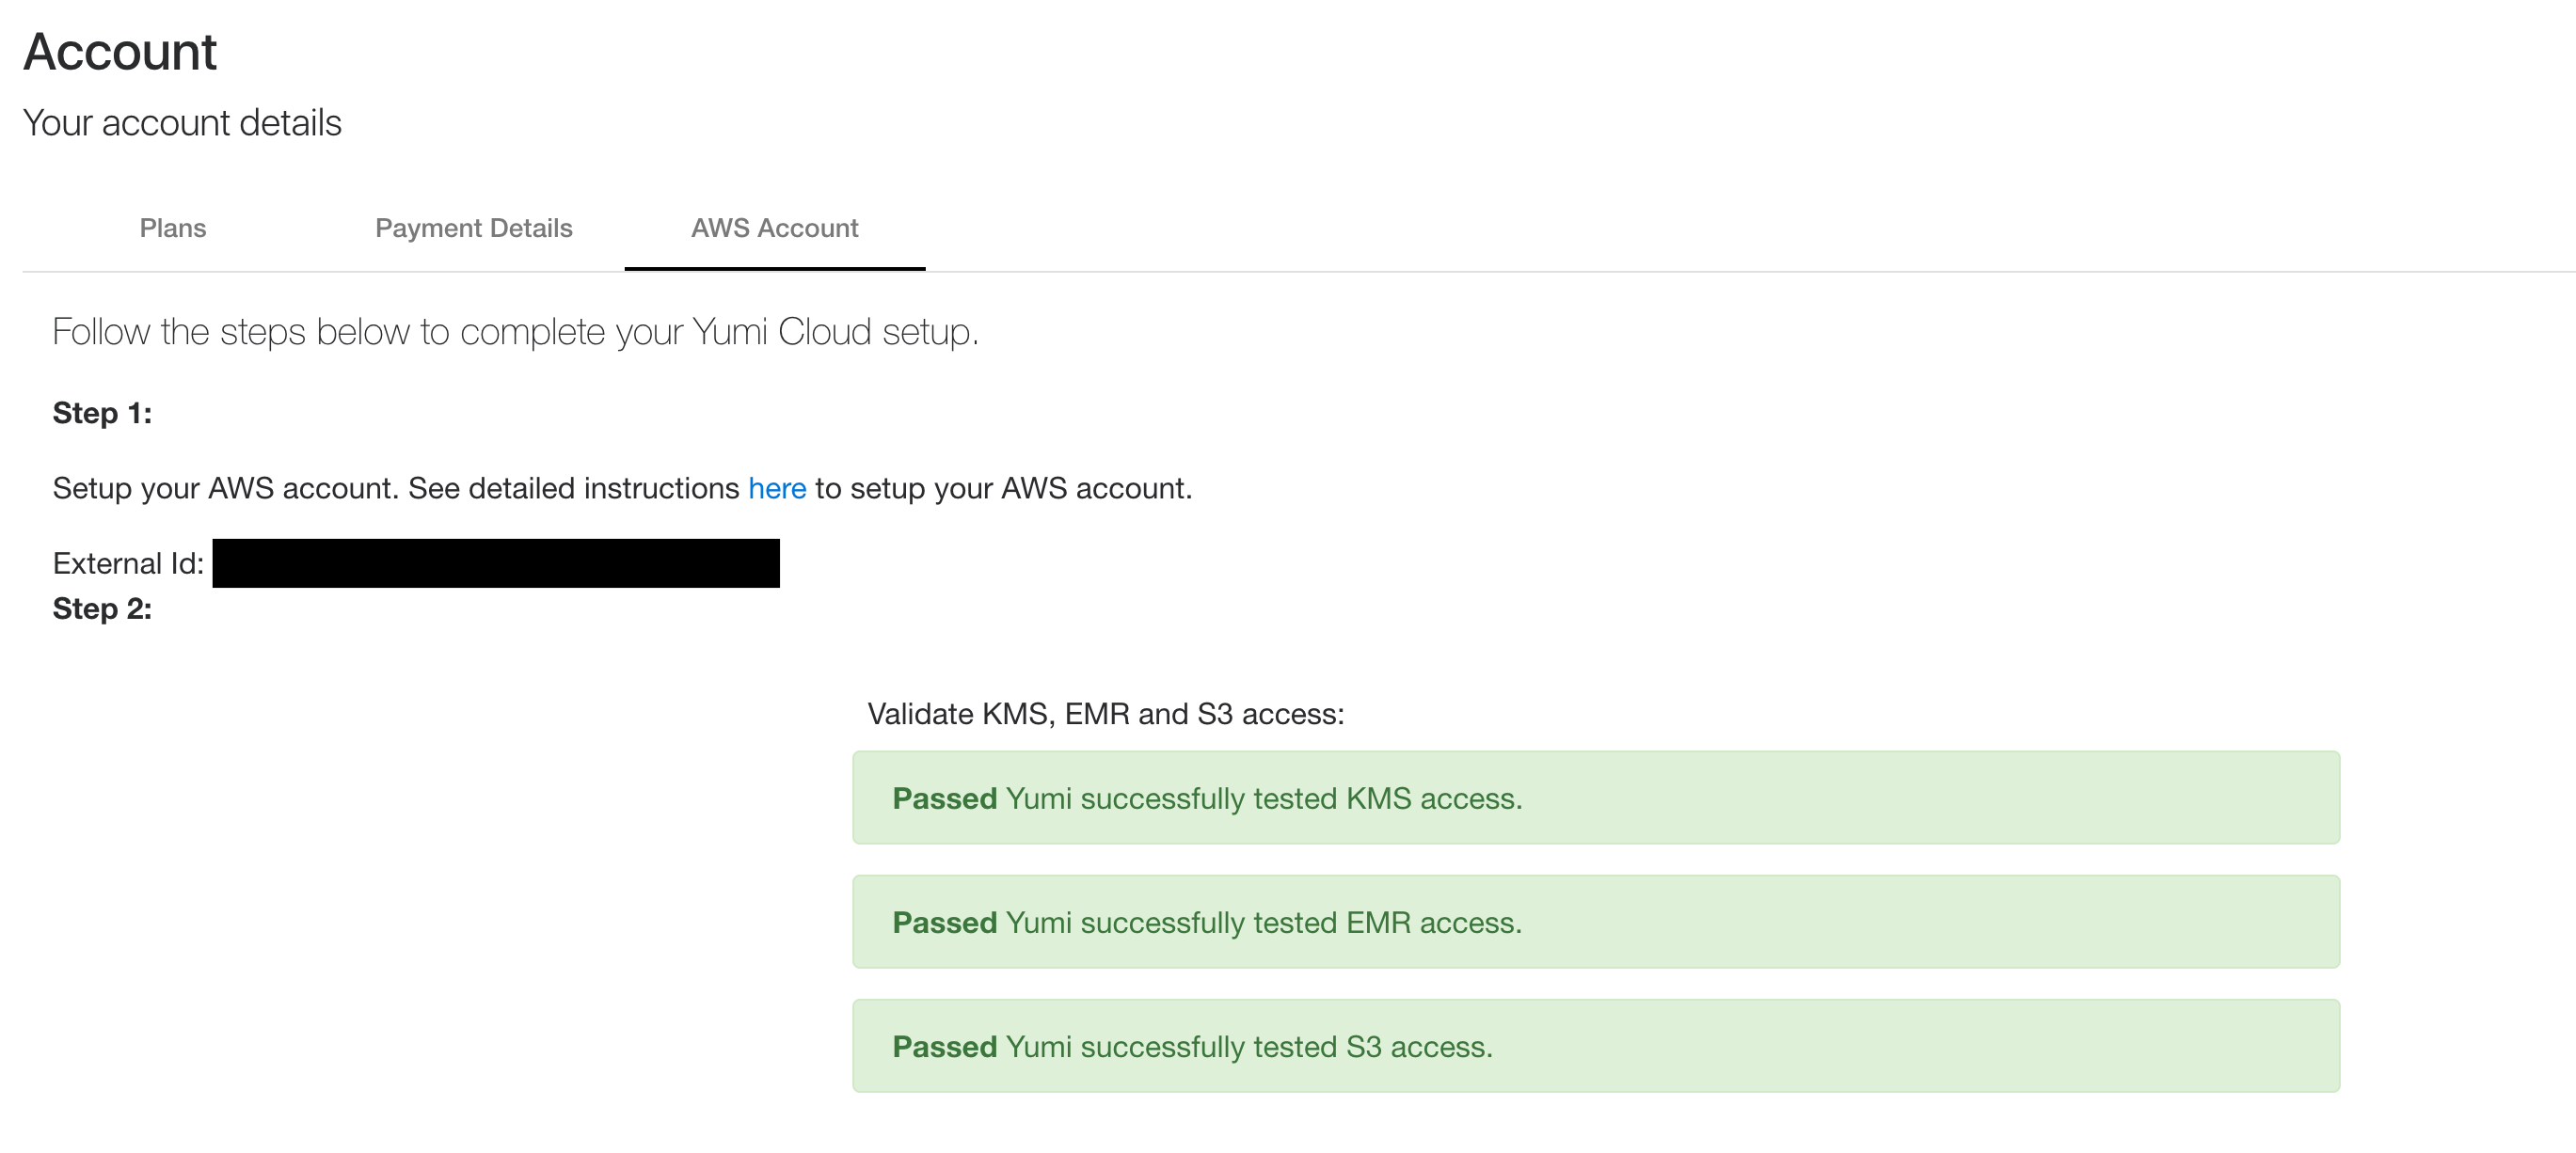
Step 6 - Populate DataRow.io AWS Account
Once you have completed Payment Details in your DataRow.io Account. You can enter you AWS Account information.
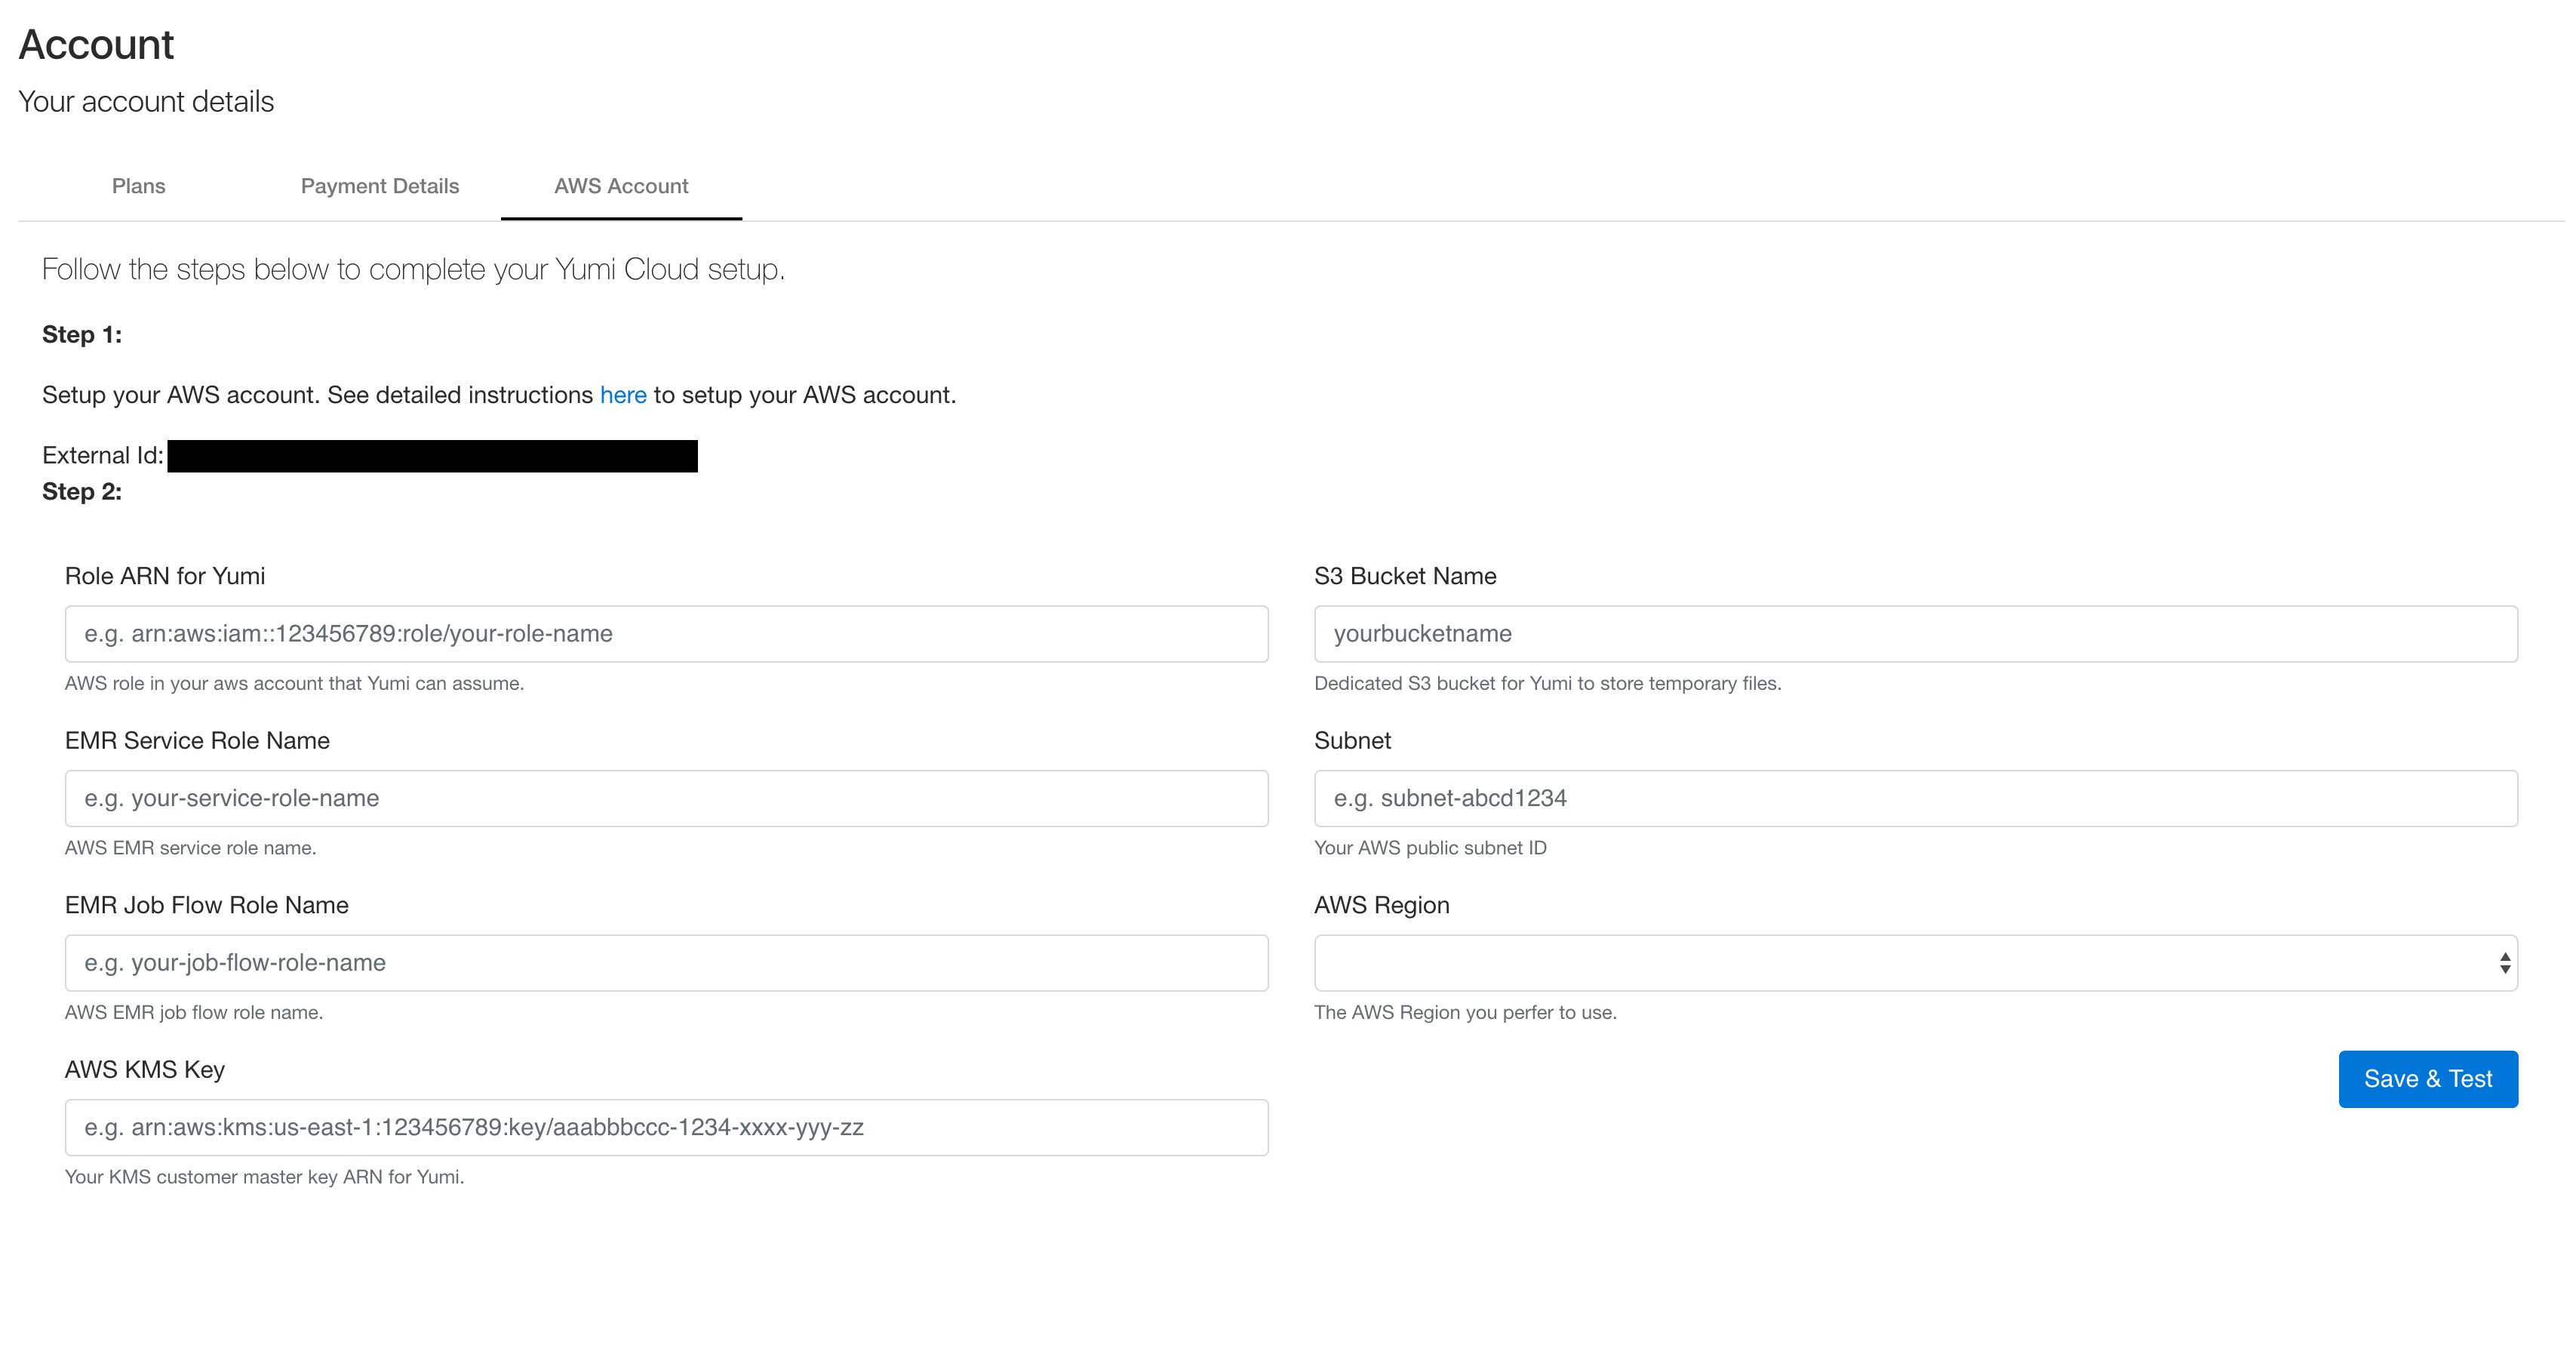
Enter ARN of DataRow.io role created from step 2 in Role ARN for DataRow.io
Enter role name of EMR role created from step 2 in EMR Service Role Name
Enter role name of EMR Role for EC2 from step 2 in EMR Job Flow Role Name
Enter ARN of CMK created from step 3 in KMS customer master key ARN
Enter bucket name of S3 created from step 1 in S3 Bucket Name
Enter subnet ID from step 4 in Subnet ID
Choose your preferred AWS region for your job runs
Click Save & Test
DataRow.io will kick off a basic validation and displays success messages.