Overview
Designer allows you to create your data pipeline visually. The data pipeline consists of linked activities (it may include logic, like if-else, foreach, etc.). In most cases, each activity represents an action in your data pipeline, for example, mysql reader activity reads data from a mysql database. You can find all available activities Here.
Job Designer
The designer is the main work area, you can:
Drag and drop the activities and arrange them.
Edit the activity to provide more details.

Components
- Toolbar
The Toolbar lists all available activities. Drag an available activity to the work area to add it to your job. Use the activity filter (at the top of the toolbar) to find activities quickly.
- Job Designer Area
This is the main work area. Here, you can:
Drop a new activity from the Toolbar to your job
Drag an activity to the shelf or click on shelve button
Edit an activity
Note
Most activities require additional details. Click the edit button to enter details.
- Shelf
The shelf acts like a recycle bin. Click the shelve button or drag an activity to the shelf to temporarily store an activity that you don’t need. Once an activity is in the shelf, you can drag it back to the job designer area or permanently delete it.
Actions
Available options for newly created job (unsaved)

Available options for existing job (saved)

Button Details:
- Save
The exclamation mark indicates there are unsaved changes. Click to store the job with all the details of your activities. Saved jobs can be viewed under Jobs.
Warning
If you make any changes in the activity detail screen, the changes are not saved until you click on save button.
- Save As
Click to save the existing job as a new job. This option will be available once the job has been saved.
- Run Now
Click to save and immediately run the job.
- Delete
Click to delete the saved job.
- Enable Auto Run
Click to define and enable a cron-like schedule for your job. When enabled, DataRow.io automatically runs the job at the selected frequency.
- Manage Auto Run
Click to edit or delete the job schedule (This option is only available when auto run is enabled).
Extra Job Settings
Click the arrow next to Name to open Extra Job Settings
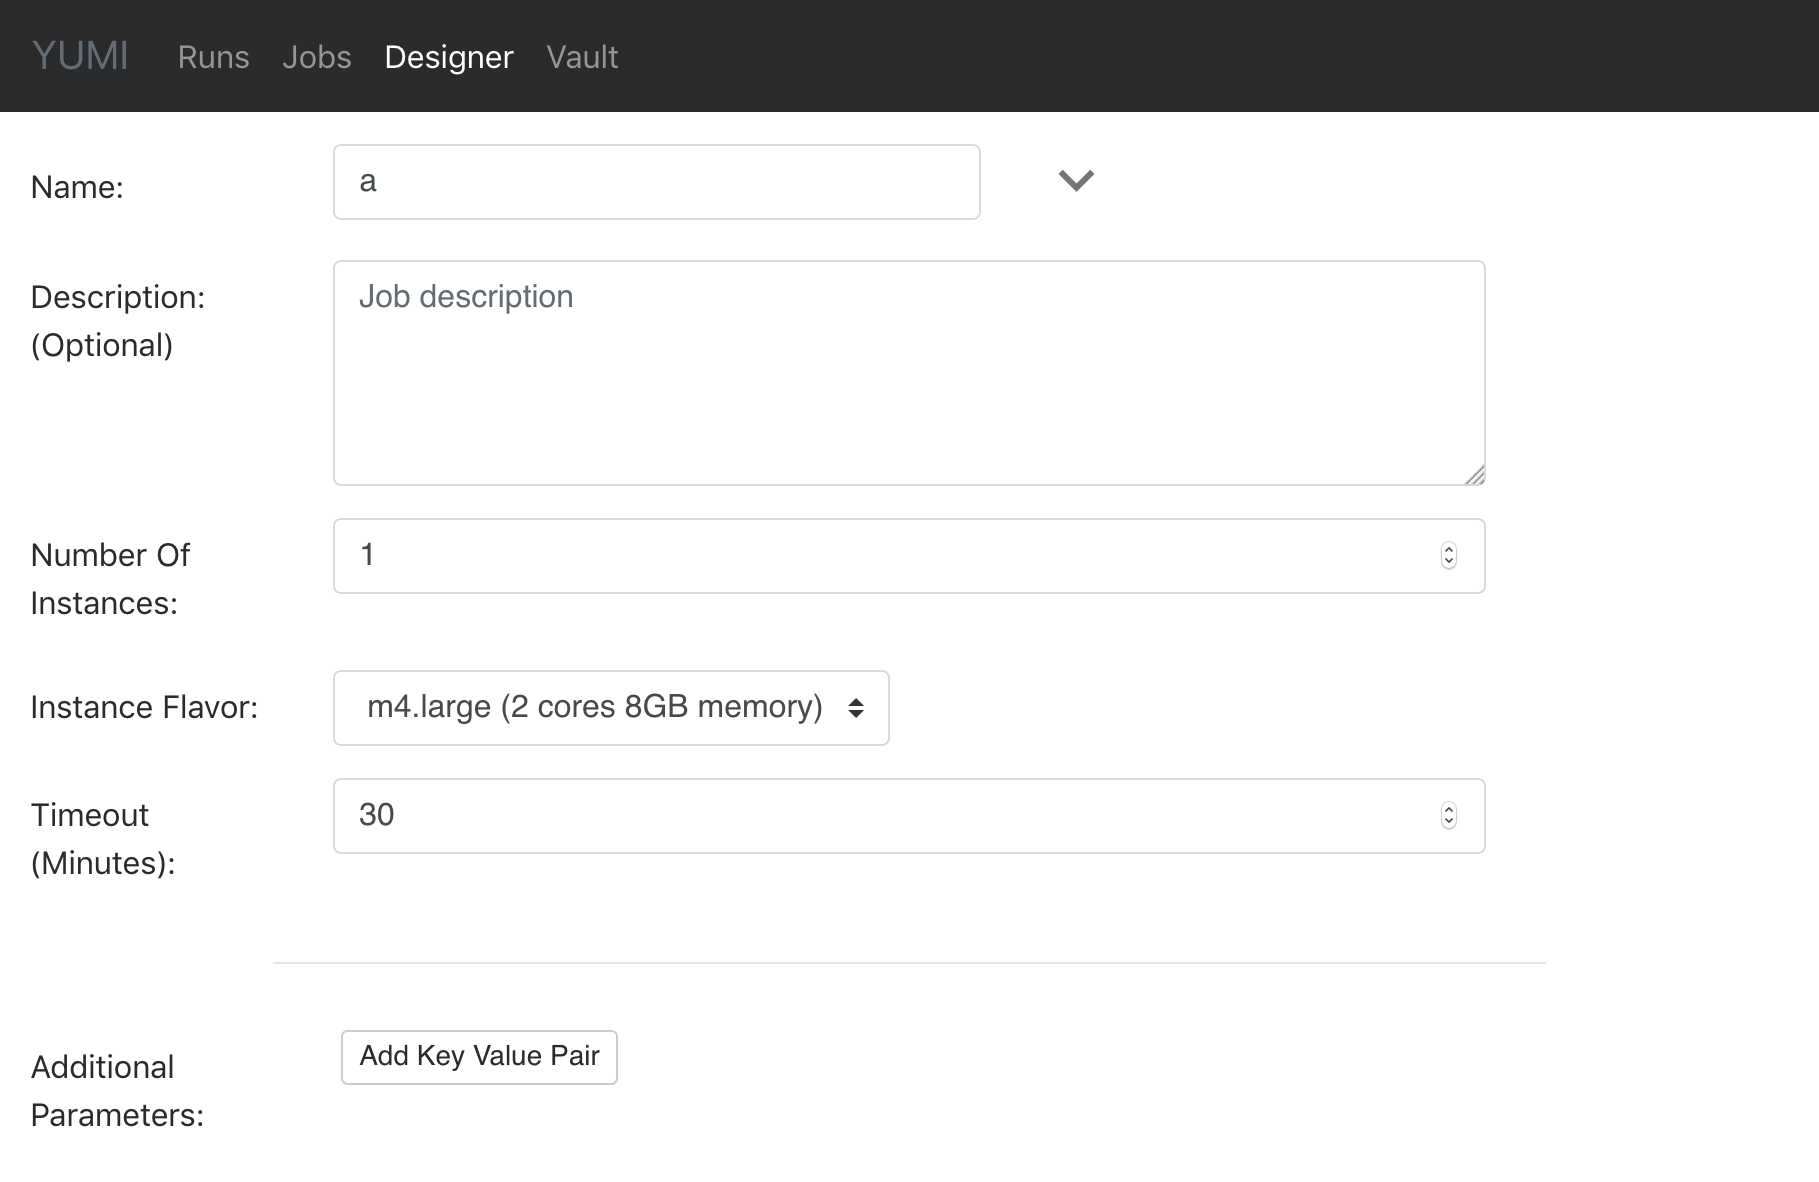
- Description
Enter a description of your job.
- Number Of Instances
Enter the desired number of instances for the cluster (including master node).
- Instance flavor
The instance type used for your cluster.
- Timeout
To prevent a run-away job (the run never finish thus the cluster is never terminated), this is the maximum time for your cluster existence before it’s terminated.
- Additional Parameters
Add additional key value pairs.
Note
Upgrade to a paid account to set larger number of instance, enable more flavors, etc, see Paid Account.
EMR on EC2 Spot Instances
If you want to use EC2 Spot Instances for your EMR cluster, you can configure it in job designer as Additional Parameters as shown in Extra Job Settings above:
Key |
Value |
|---|---|
datarow.use-spot-instances |
true |
Inside the Job Designer Area
Job Designer Area is the work space to list your activities. The activities here will be executed from top to bottom during a job run.

Activities in Job Designer Area
- Drag & Drop
Just like the list of activities in the Toolbar, all activities in the job designer area are draggable. Drag activities to reorder them or drag activities to the shelf to remove them from execution.
- Red exclamation mark
The activity is missing required field(s). Click the gear icon to edit activity details.
- Activity title
By default, the activity title is the name of the activity. Click the gear icon to access activity details and enter new activity title.
- Delete activity
Click on the trash bin icon to move the activity to shelf, or simply drag it to shelf.
Note
Choose complex activities to alter the flow of activity execution (e.g. If Condition, ForEach Iterator, etc.). See the Activity Details section for more detail.